之前在学习cuda和使用opencv来加速图像处理,同时由于用惯了jetbrain系列,所以不想用vs来写代码,于是在配环境的时候看了很多网上的教程踩了很多坑,大概弄了3天才弄好,不过最近又手贱重装了cuda,所以之前编译的包不能用了,重新配置的时候感觉又忘了很多东西,于是决定写一篇博客来记录下之前操作,可能不是很全,重装电脑的时候再补充。
基础环境
我主机使用的是操作系统x64,GPU是RTX 3080,有的环境太高了反而不好使,因此是如下环境:
- cuda-toolkit:11.4,下载地址:https://developer.nvidia.com/cuda-toolkit-archive
- cudnn:8.4.1,下载地址:https://developer.nvidia.com/rdp/cudnn-download
- opencv:4.5.5,下载地址:https://opencv.org/releases/,这里得下载源码 source
- opencv_contrib:4.5.5,下载地址:https://github.com/opencv/opencv_contrib/tags,该版本要与opencv一致
- cmake:3.19.1,下载地址:https://cmake.org/download/
- visual Studio build tool:2019,下载地址:https://visualstudio.microsoft.com/downloads/
- clion:2022.1,下载地址:https://www.jetbrains.com/zh-cn/clion/download/#section=windows,该编译器要比较新才行,否则无法debug
CUDA-toolkit && cudnn
CUDA安装配置
CUDA下载安装包后正常安装,安装完毕后重启电脑,随后加一下系统变量
1 | C:\Program Files\NVIDIA GPU Computing Toolkit\CUDA\v11.4\bin |
能够使用nvidia-smi进行环境则证明安装成功
CUDNN安装配置
将下载的文件如cudnn-11.4-windows-x64-v8.1.1.33.zip解压后将内容
1 | [path]/cudnn-windows-x86_64-8.4.1.50_cuda11.6-archive/bin/ |
分别复制于进行合并
1 | C:\Program Files\NVIDIA GPU Computing Toolkit\CUDA\v11.4\bin |
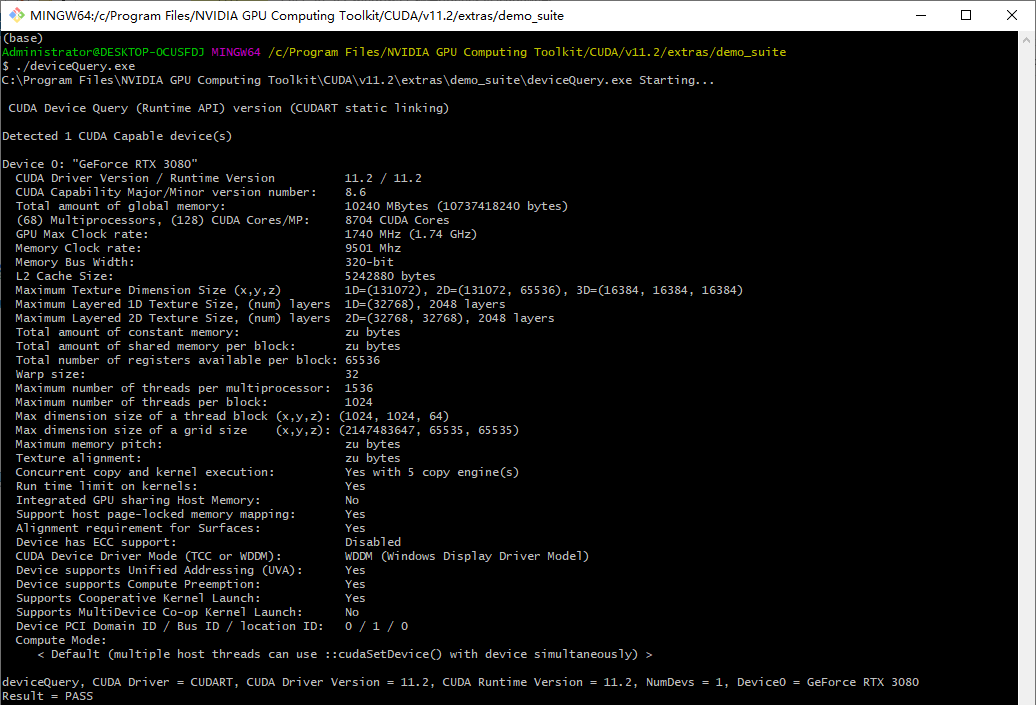
于 C:\Program Files\NVIDIA GPU Computing Toolkit\CUDA\v11.4\extras\demo_suite 中执行 deviceQuery.exe 若Result显示为PASS则证明安装成功:
opencv编译
可以把opencv_contrib的代码解压到opencv的源码中,并创建一个 vs2019-cuda11-build 文件夹用于存放编译后库,我的目录如下:
1 | - opencv4.5.5 |
第一次configure
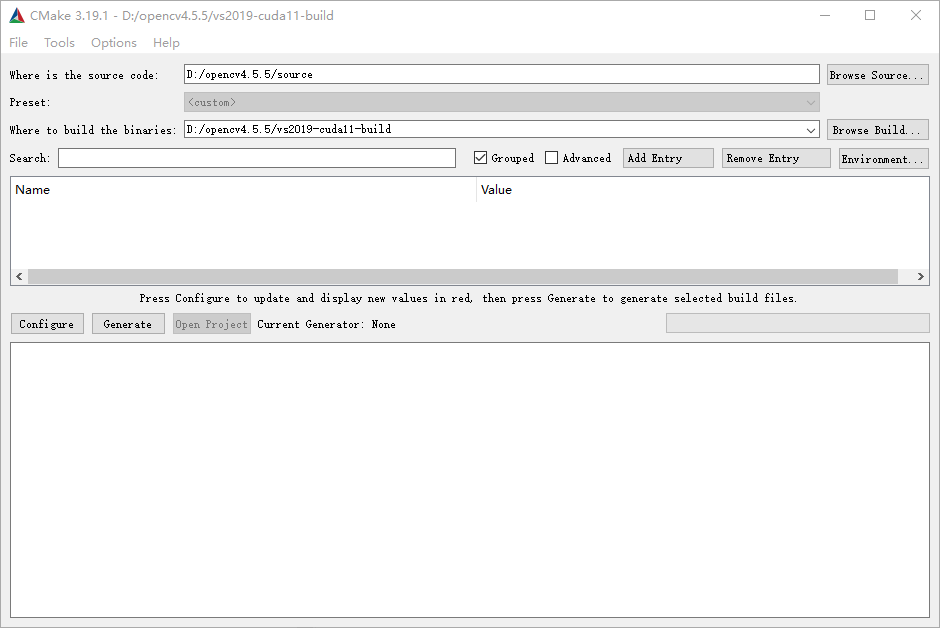
使用 [cmake_path]\path\bin 下的 cmake-gui.exe 的图形化界面进行编译配置,首先选择 source code 和 Where to build the binaries :
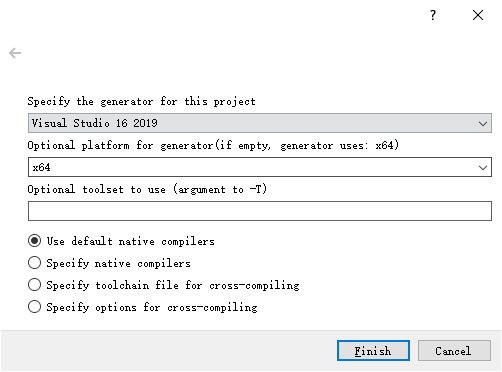
点击 configure 后弹出以下窗口,根据自己主机的环境配置进行选择:
点击 Finish 后,第一次 configure 完成之后,过程中会有很多文件大概率下载失败,比如:opencv_videoio_ffmpeg.dll ,窗口有红字提示。
打开 D:/opencv4.5.5/vs2019-cuda11-build/CMakeDownloadLog.txt 看里面的日志
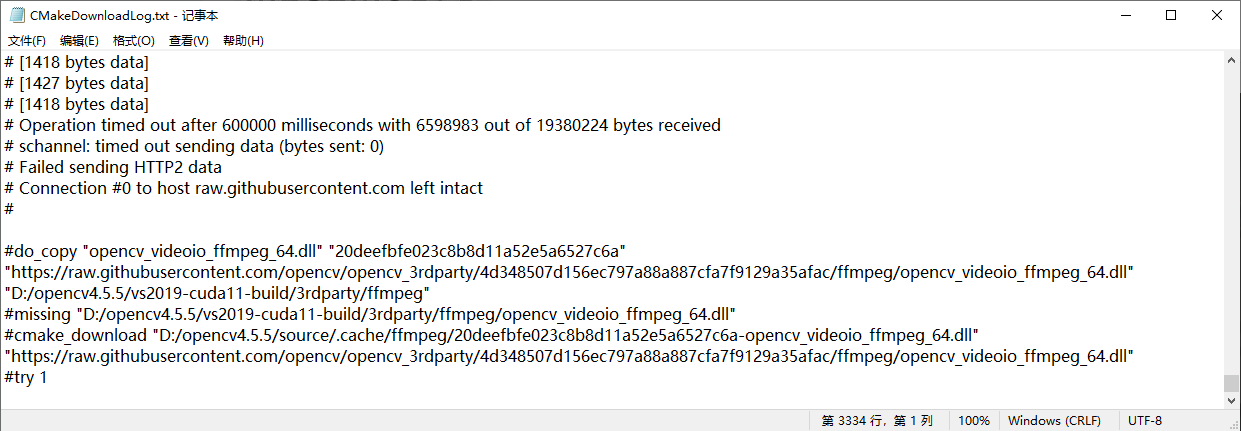
分析推断下载地址为:https://raw.githubusercontent.com/opencv/opencv_3rdparty/4d348507d156ec797a88a887cfa7f9129a35afac/ffmpeg/opencv_videoio_ffmpeg_64.dll,实验检验后,发现下载文件 opencv_videoio_ffmpeg_64.dll 后不能直接放入D:\opencv4.5.5\source\3rdparty\ffmpeg 中,需要将其重命名为 20deefbfe023c8b8d11a52e5a6527c6a-opencv_videoio_ffmpeg_64.dll 并放入 D:\opencv4.5.5\source\.cache\ffmpeg 中,让编译程序检验 md5 和自动重命名拷贝。对后续下载失败的文件皆是如此操作,不再赘述。
第二次configure
添加
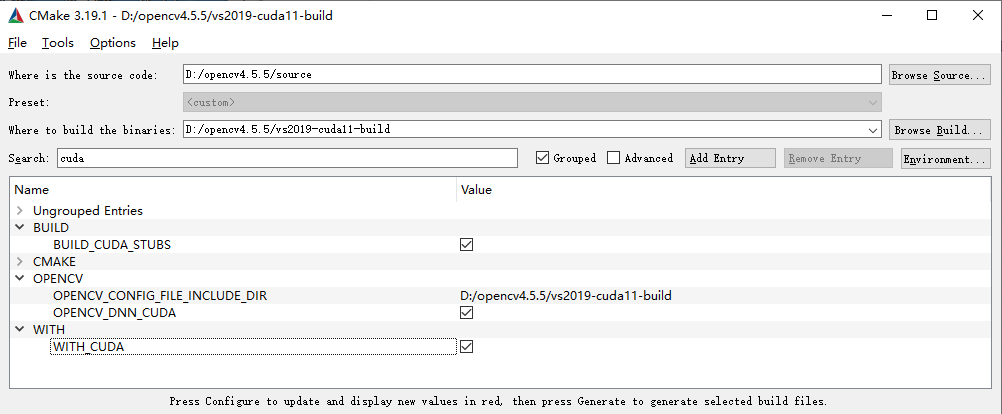
下面要进行进一步的 configure 配置,在 search 中输入 cuda 并勾选相关选项以支持 cuda:
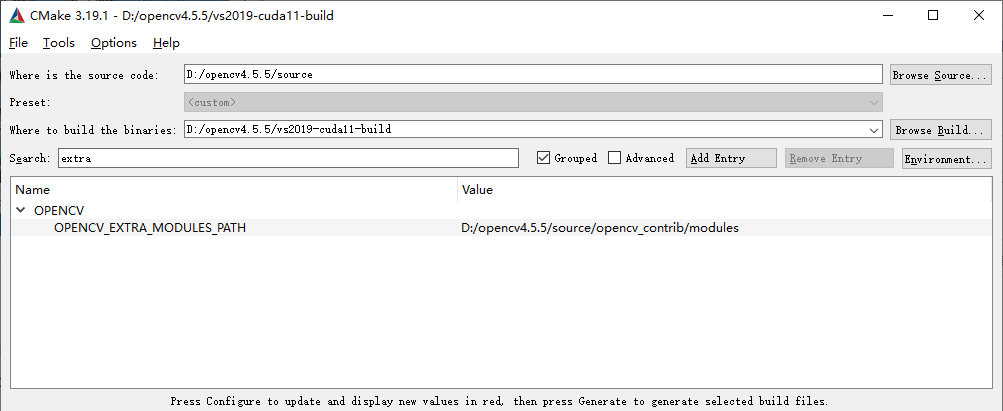
OPENCV_EXTRA_MODULES_PATH 选择 opencv_contrib\modules 所在目录:
World 勾选相关选项以支持包的集成。

再次点击 configure 。
第三次configure
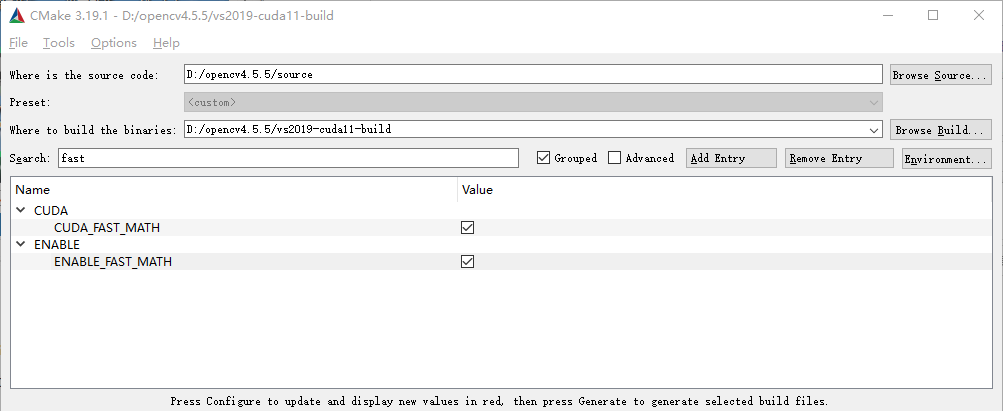
fast 勾选相关选项以支持快速数学运算
CUDA_ARCH_BIN 中可以删除无关的配置加快编译速度,可以从 deviceQuery.exe 的结果中查询到,本机的架构为 8.6 。更多请查看英伟达官网的 CUDA-Enabled GeForce and TITAN Products 中配置详解。

最后点击 Generate 。
vs 构建
visual studio在安装时需要勾选 使用c++的桌面开发,安装结束后将 C:\Program Files (x86)\Microsoft Visual Studio\2019\Community\VC\Tools\MSVC\14.29.30133\bin\Hostx64\x64 加入环境变量
Release
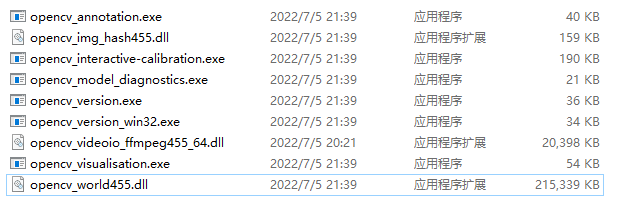
于 D:/opencv4.5.5/vs2019-cuda11-build 中用visual studio打开 OpenCV.sln ,于“解决方案资源管理器中”分别找到 CMakeTargets\ALL_BUILD 和 CMakeTargets\INSTALL,选择 Release 下的 x64 模式进行构建。构建成功后会在 D:\opencv4.5.5\vs2019-cuda11-build\install\x64\vc16\bin 下生成 opencv_world455.dll 等文件:
Debug
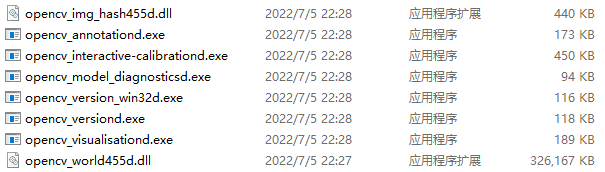
同样如果选择 Debug 下的 x64 模型进行构建。构建成功后会在 D:\opencv4.5.5\vs2019-cuda11-build\install\x64\vc16\bin 下生成 opencv_world455d.dll 等文件:
Clion中使用
配置
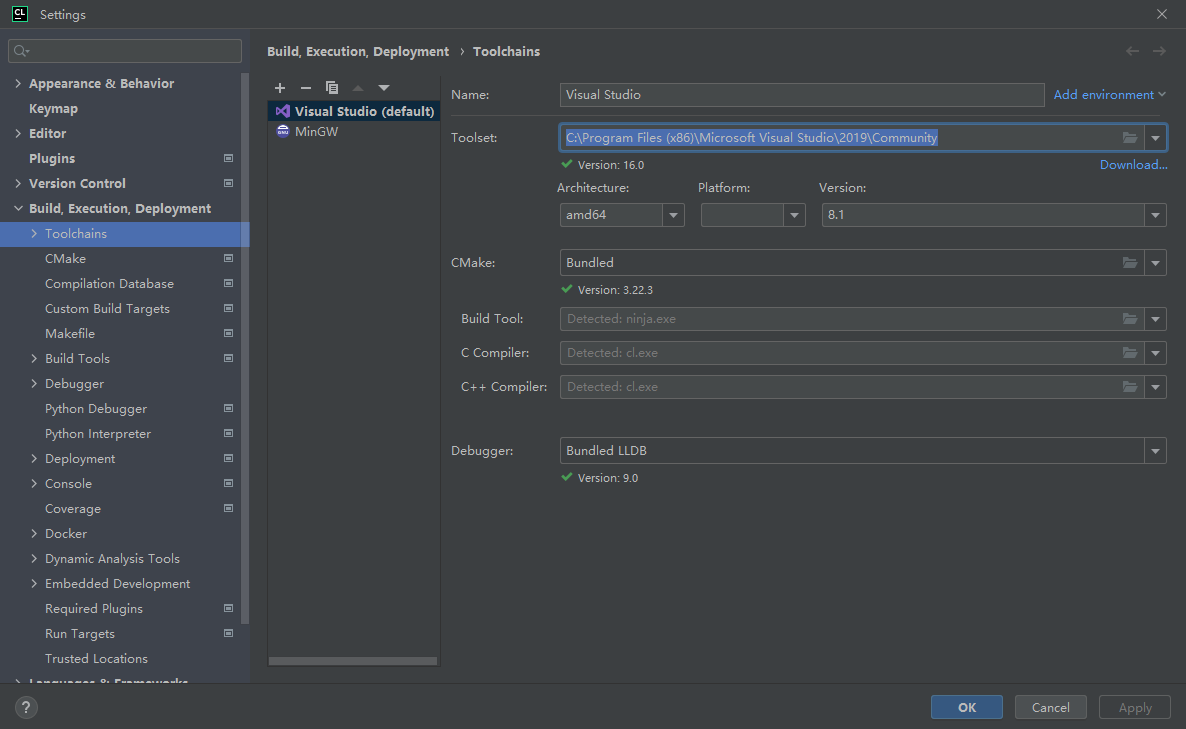
Toolchains
创建新的 Visual Studio 的环境,Toolset 选择刚刚用于编译 opencv 的 Visual Studio 2019 的位置 C:\Program Files (x86)\Microsoft Visual Studio\2019\Community
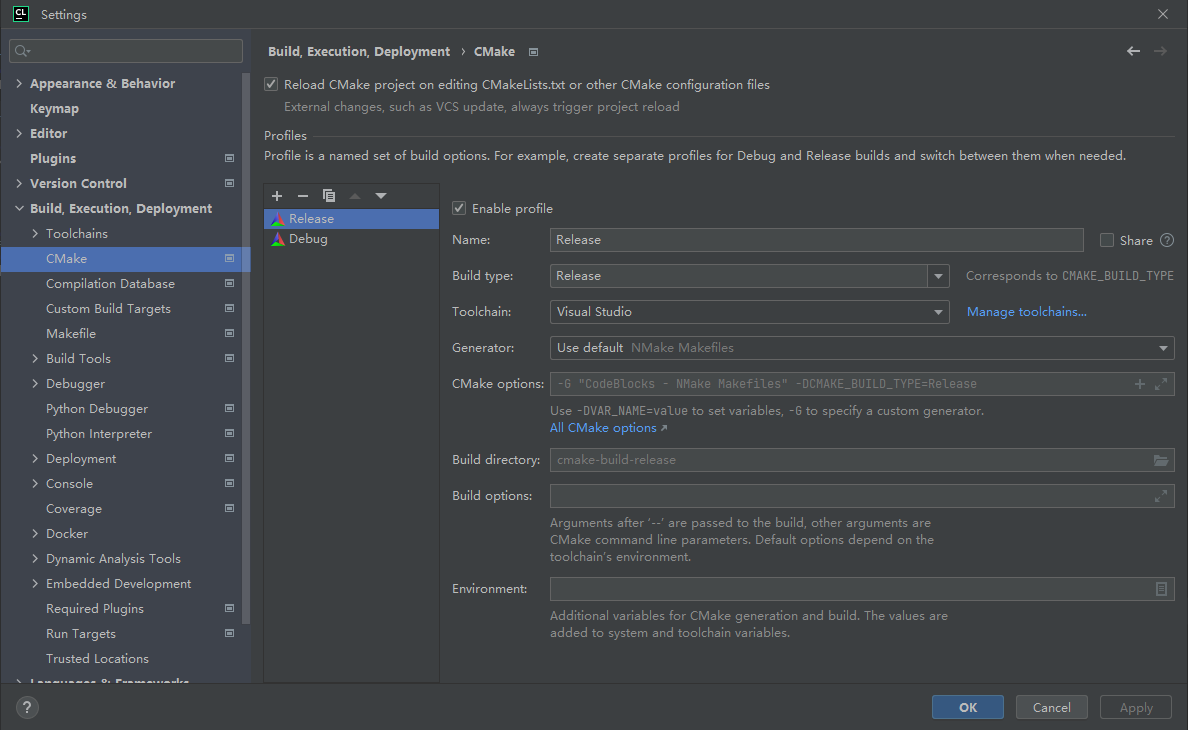
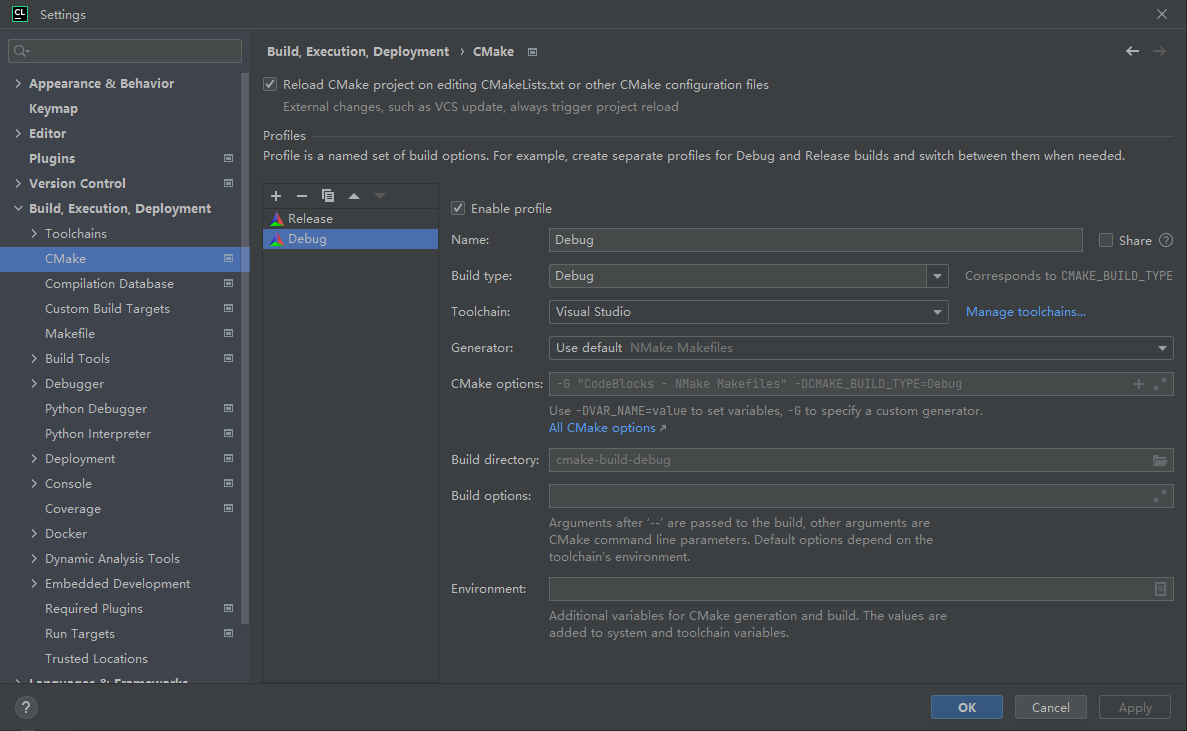
Cmake
分别配置 Release 和 Debug 中的两种 build type:
CMakeLists.txt
参考的 CMakeLists.txt 编写如下:
1 | Project(CUDA_Freshman CXX C CUDA) |
测试
测试代码如下:
1 |
|
输出以下信息则证明配置成功
1 | *** CUDA Device Query (Runtime API) version (CUDART static linking) *** |